


Introduction to Blender 3D
Blender 3D is an open-source 3D computer graphics software. It is a powerful free application that can do all things 3D. From 3D modeling to rendering, animations, simulations and visual effects.
In this article we will discover Blender 3D. We will download the software and talk about few things to consider before setting it up for our projects.
You can get the software from Blender.org, the official blender website. Simply go to the download page. The browser should automatically detect the type of operating system you have. It will show you the latest stable version suited for your system. Blender is available for macOS. Linux and Windows. All throughout this article, I will be focusing primarily on blender for windows. Windows is the only system that I currently have and use. As of this writing, the latest stable version is Blender 5.2 LTS. Click the “Download Blender” button, wait for the download to finish, and install it like any other software. Wait until the installation is complete and then launch it from the desktop icon.

Figure 1: The Blender Download Page
Other Blender Windows Package
Blender has 2 types of Windows packages. The Installer (described in the previous paragraph) and the Portable. Choosing what package you need depends on you.
I choose the portable package, for 2 main reasons:
First, blender is updated so often that a new version is being released every couple of months. With a portable, you don’t need to uninstall the previous version. Simply download the new version, put it in a folder in you PC and run it as usual. You can even run different version simultaneously in one PC. If you no longer need the old version, it is easier to delete it (and all its data) than uninstalling it.
Second, switching between different versions of blender is easier with the portable package. Switching between versions can happen sometimes when add-ons are not yet compatible with the new version. Add-ons may take time to catch up with the new release version. So, while waiting for the update, keep a copy of the old version and use the working set-up. There are cases that paid add-ons are no longer supported by its authors, but still has some significant features that you need. So, instead of buying new add-on, its more practical to use the blender version that works with that add-on.
Downloading the Portable Package
To download the portable package, expand the dropdown menu “macOS, Linux, and other versions”. Click the “Windows Portable (.zip)” and wait for the download to finish. Navigate to your download folder and save the .zip file anywhere in your hard drive. Extract the contents to your preferred folder. Once extraction is completed, you can open blender using the “Blender.exe” or “Blender-launcher.exe” inside the folder.

Figure 2: Downloading Different Blender package
Previous Blender 3D Versions
Another thing to consider is system capability. In general, 3D computer graphics software are resource-hungry applications. As the software evolves, new features are introduced, further increasing the system requirements needed by each version release. You can check blender’s minimum system requirements here. In order to be able to run blender, you need to know what version will work in your machine. If you find issues running blender in your PC due to hardware limitations, you can try older version. You can still access all the previous blender releases. In the download page, go to the “Previous Version” tab. Then, click the “Download Any Blender” button. This will take you to a repository where all version is available for download.

Figure 3: Download Previous Version of Blender 3D
Opening Blender for the First Time
The first time you open blender a small window will pop-up in the User Interface. This is the splash screen. It is a quick set-up menu that lets you import settings from previous blender versions. If you are updating to a new blender version, you get the option to carry over the settings from the old version by clicking the “Import Blender #.# Preferences”. You can also change some settings from this screen as shown in the figure below (right image). All these settings can also be changed from the user preferences. Note that splash screen’s quick set up menu will only appear on blender’s start up as long as you don’t create and save a new blend file. Once you’ve created a blend file and closed the app, this menu will be replaced by a different set of “File menus” on your next Blender session (left image).
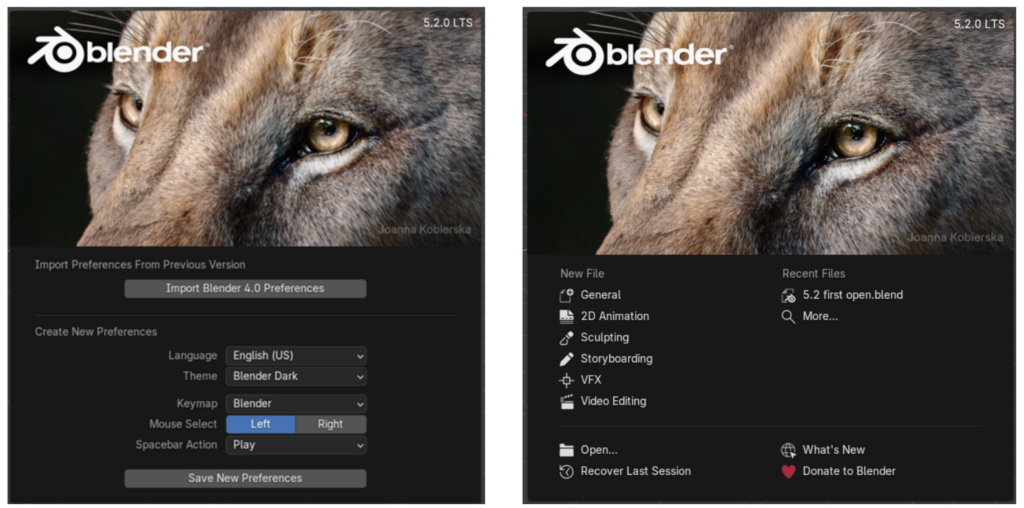
Figure 4: Comparison of Blender Splash Screen. On the left is Blender’s Splash Screen the first time you open it. On the right is the Splash Screen of the next session after saving a blend file.
Clicking anywhere in the user interface will automatically close the splash screen. To bring it back, click the white blender logo at the top-left corner of the screen and select “splash screen” and it will reappear.

Figure 5: Bring Back Blender Splash Screen
Now you have blender on your PC. In the next article we will explore and set up few important settings in the user preferences that will make your life a little bit easier when we go into 3D modeling.